有问题: 当出现了ChatGPT,我发现我的编程能力直接退化,遇到问题,问他,错了继续问,总有一次会问对的。
某个场景,我需要将中文转换为16进制的字符串。(其实就是在evm中留言功能,但是evm只认16进制)
这个功能本来很简单的,直到我发现中文转换出现了异常。(你就不会只用英文写)
原代码:
1
2
3
4
5
6
7
8
9
10
11
12
13
14
15
16
17
class StringToHex { public static void main (String[] args) { String originalString = "你好" ; String hexString = convertStringToHex(originalString); System.out.println("原始字符串: " + originalString); System.out.println("转换为16进制字符串: " + hexString); } public static String convertStringToHex (String str) { StringBuilder hexString = new StringBuilder (); for (char character : str.toCharArray()) { String hex = Integer.toHexString(character); hexString.append(hex); } return hexString.toString(); } }
GPT答案: 问了N次后GPT给出的新代码。
1
2
3
4
5
6
7
8
9
10
11
12
13
14
15
16
17
18
19
20
21
22
import java.nio.charset.StandardCharsets;public class StringToHex { public static void main (String[] args) { String originalString = "你" ; String hexString = convertStringToHex(originalString); System.out.println("原始字符串: " + originalString); System.out.println("转换为16进制字符串: " + hexString); } public static String convertStringToHex (String str) { StringBuilder hexString = new StringBuilder (); for (int i = 0 ; i < str.length(); i++) { char ch = str.charAt(i); String hex = Integer.toHexString(ch); hexString.append(hex); } return hexString.toString().toUpperCase(); } }
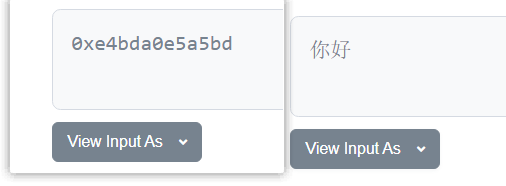
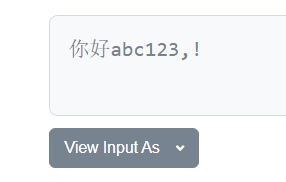
我尝试将中文和英文数字和标点符号混合,比如
你好abc123,!
但是这种测试居然不通过,我就不能理解了。
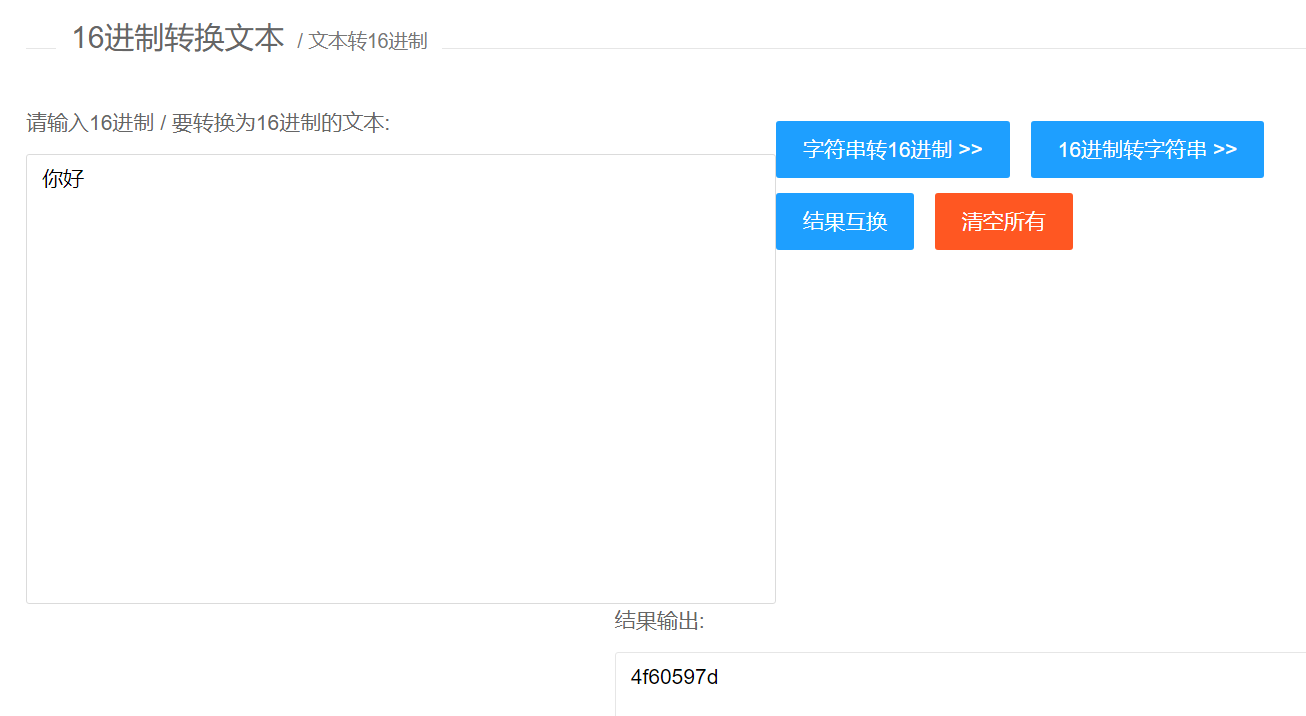
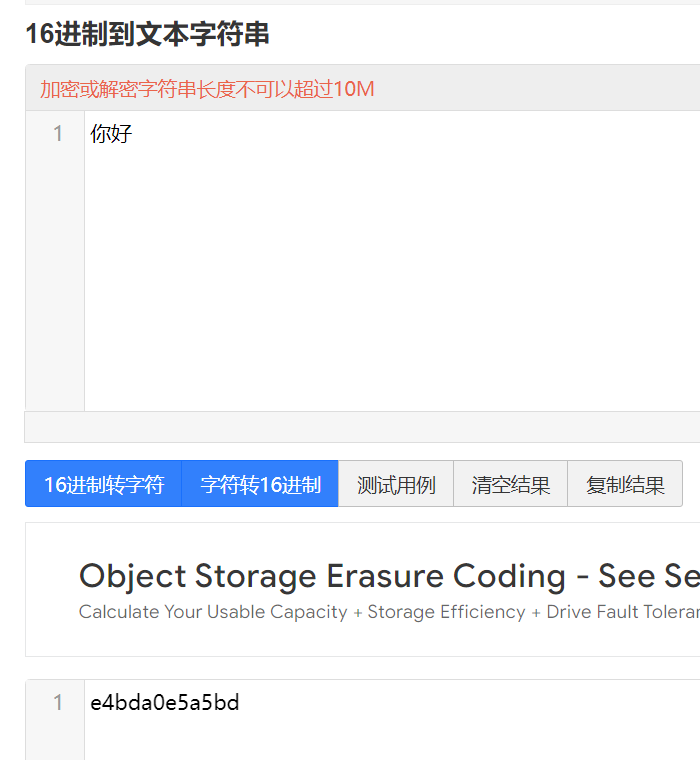
再试试看纯中文的。
你好
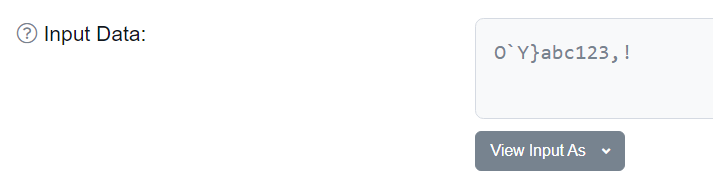
我就非常不能理解,连网上的转换工具也是给出一样的转换结果。
结果浏览器就是不显示。
这…….
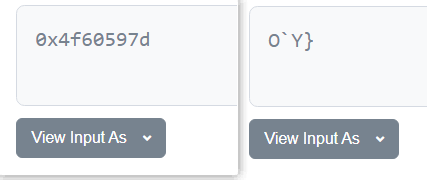
工具不一致: 卧槽,好像其他的工具转换的结果不一样,纳尼……
我TM的…..
继续问GPT去,总会有结果的。
GPT答案2: GPT又给出新+代码。
1
2
3
4
5
6
7
8
9
10
11
12
13
14
15
16
17
18
19
20
21
22
23
24
import java.nio.charset.StandardCharsets;public class StringToHex { public static void main (String[] args) { String originalString = "你好" ; String hexString = convertStringToHex(originalString); System.out.println("原始字符串: " + originalString); System.out.println("转换为16进制字符串: " + hexString); } public static String convertStringToHex (String str) { byte [] bytes = str.getBytes(StandardCharsets.UTF_8); StringBuilder hexString = new StringBuilder (); for (byte aByte : bytes) { String hex = Integer.toHexString(aByte & 0xff ); if (hex.length() == 1 ) { hexString.append('0' ); } hexString.append(hex); } return hexString.toString(); } }
这个给出的答案和上面的网站是一样的。
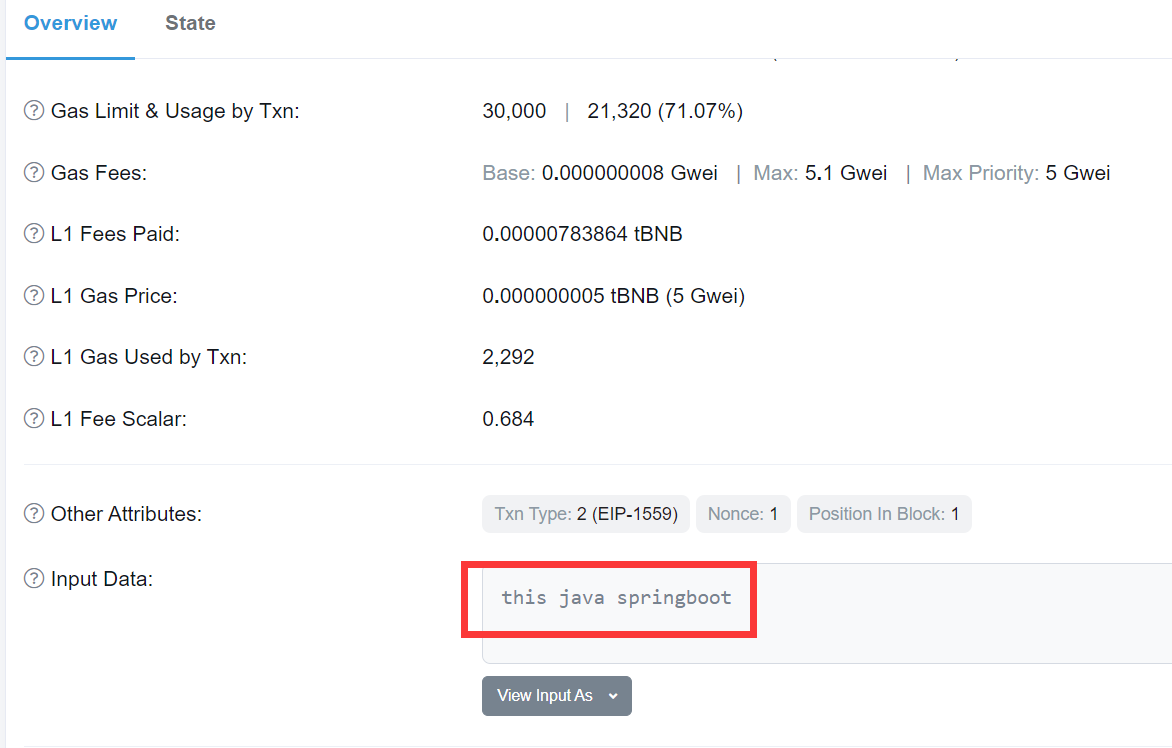
我们发送一笔交易,去浏览器看看结果。
这就正常了。
反正又就继续问GPT,总会问对的。(这样还要你干嘛)
我继续测试上面的那个复杂组合,如果没有问题就证明这个方法写对了。
ok,感谢GPT。
写后端: 我这边写一个留言简单的demo,他只有留言的内容,你可以在内容里面写上留言的人是谁。
然后这个留言信息会被发送到区块链,因为主网需要手续费,所以我选择了测试网来实验程序。
测试网:opbnb testnet
后端接口:springboot+云函数
至于怎么样部署云函数可以查看我之前的文章,这里就不重复介绍了。
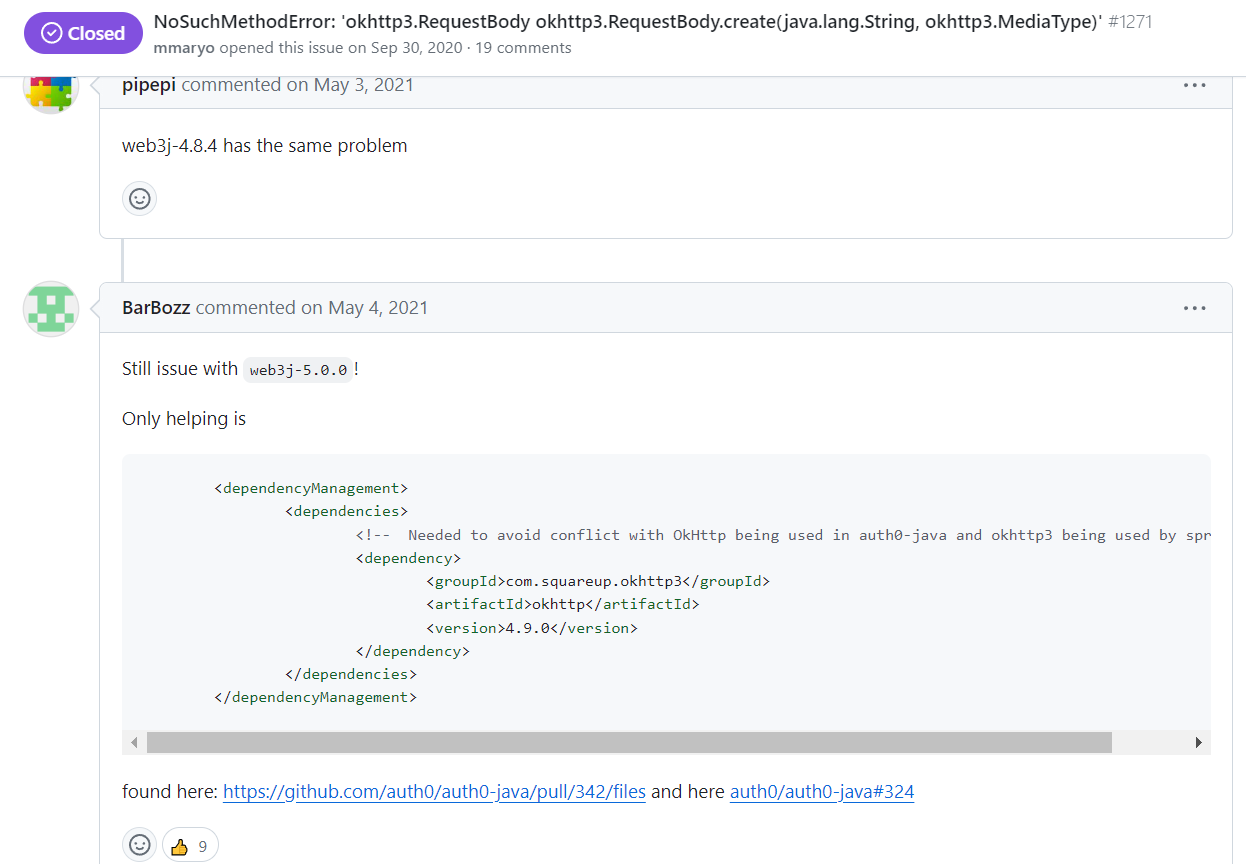
这里我遇到了一个GPT都无法解决的BUG,我重新构建了数次项目都无济于事。我一度怀疑是IDE的环境问题,然后我更换了编辑器仍然不解决问题。包括但不限于重新创建SpringBoot项目,重新创建maven项目然后改造为springboot项目,但是这些都不能解决问题。
报错代码如下所示:
1
2
3
4
2024-01-06 01:38:10.547 ERROR 5172 --- [nio-8080-exec-1] o.a.c.c.C.[.[.[/].[dispatcherServlet] : Servlet.service() for servlet [dispatcherServlet] in context with path [] threw exception [Handler dispatch failed; nested exception is java.lang.NoSuchMethodError: okhttp3.RequestBody.create(Ljava/lang/String;Lokhttp3/MediaType;)Lokhttp3/RequestBody;] with root cause java.lang.NoSuchMethodError: okhttp3.RequestBody.create(Ljava/lang/String;Lokhttp3/MediaType;)Lokhttp3/RequestBody; at org.web3j.protocol.http.HttpService.performIO(HttpService.java:159) ~[core-4.8.7.jar:na]
我无奈的把错误信息在谷歌搜索,他只有一条结果,指向了github webj的讨论区。
https://github.com/web3j/web3j/issues/1271
我找到了一个方案,我尝试修复他。
他的意思大概是说人们运行springboot的时候,okhttp3依赖会莫名其妙的消失,他建议他们手动添加该依赖。
这是什么鬼理论,依赖包不见了不去修复,让用户手动添加……
1 2 3 4 5 6 <dependency > <groupId > com.squareup.okhttp3</groupId > <artifactId > okhttp</artifactId > <version > 4.9.0</version > </dependency >
但是这个做法是没有问题的,既然找不到,那就手动加一个,我就是要他上面的版本依赖(这样不容易出问题)。
当我在本地测试成功的时候,鬼知道我多么高兴,可以去睡觉了。
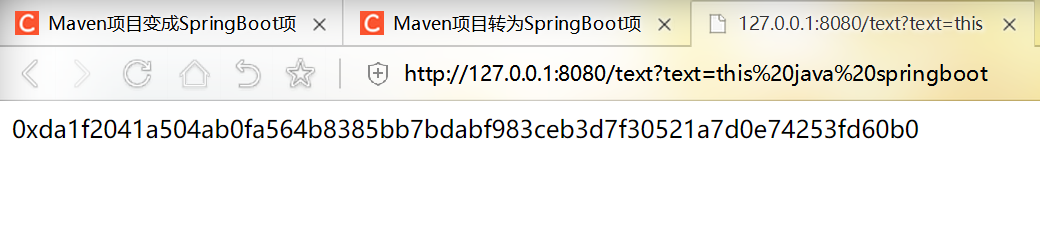
发送成功了,给出了哈希值。
验证地址:
https://opbnb-testnet.bscscan.com/tx/0xda1f2041a504ab0fa564b8385bb7bdabf983ceb3d7f30521a7d0e74253fd60b0
睡觉,睡觉。
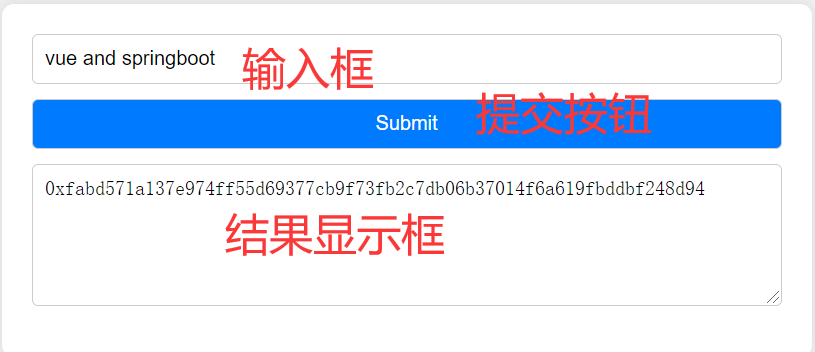
写前端: 让GPT接着写前端,遇到一个小问题。
最方便的做法就是直接复制错误信息提问,其实就是同源策略 出了问题,也好解决。
如果你还不知道什么叫做同源策略,请百度后再来查看本文。
这是最初完成的代码:
1
2
3
4
5
6
7
8
9
10
11
12
13
14
15
16
17
18
19
20
21
22
23
24
25
26
27
28
29
30
31
32
33
34
35
36
37
38
39
40
41
42
43
44
45
46
47
48
49
50
51
52
53
54
55
56
57
58
59
60
61
62
63
64
65
66
67
68
69
70
71
72
73
74
75
76
77
78
<!DOCTYPE html > <html lang ="en" > <head > <meta charset ="UTF-8" > <title > Submit Text</title > <script src ="https://cdn.jsdelivr.net/npm/vue@2.6.14/dist/vue.min.js" > </script > <script src ="https://cdn.jsdelivr.net/npm/axios/dist/axios.min.js" > </script > <style > body { display : flex; justify-content : center; align-items : center; height : 100vh ; background-color : #f0f0f0 ; } .container { width : 80% ; max-width : 500px ; text-align : center; padding : 20px ; background-color : #fff ; border-radius : 8px ; box-shadow : 0 0 10px rgba (0 , 0 , 0 , 0.1 ); } input [type="text" ] , button , textarea { width : 100% ; margin-bottom : 10px ; padding : 8px ; border-radius : 4px ; border : 1px solid #ccc ; box-sizing : border-box; } button { background-color : #007bff ; color : #fff ; cursor : pointer; } </style > </head > <body > <div id ="app" class ="container" > <input type ="text" v-model ="inputText" placeholder ="Enter text" > <button @click ="submitText" > Submit</button > <textarea v-model ="response" rows ="5" placeholder ="Response" readonly > </textarea > </div > <script > new Vue ({ el : '#app' , data : { inputText : '' , response : '' }, methods : { async submitText ( if (!this .inputText .trim ()) { this .response = '请输入文本' ; return ; } try { const response = await axios.get (`http://localhost:8080/text?text=${this .inputText} ` , { timeout : 30000 }); this .response = response.data ; } catch (error) { console .error (error); this .response = 'Error occurred while fetching data.' ; } } } }); </script > </body > </html >
其实还是不错的,至少我也起来也就这个样子了。
前端部署专业的都写不好,只要功能实现了就不要纠结太多的东西。
怎么说呢,简洁,但是功能实现了。
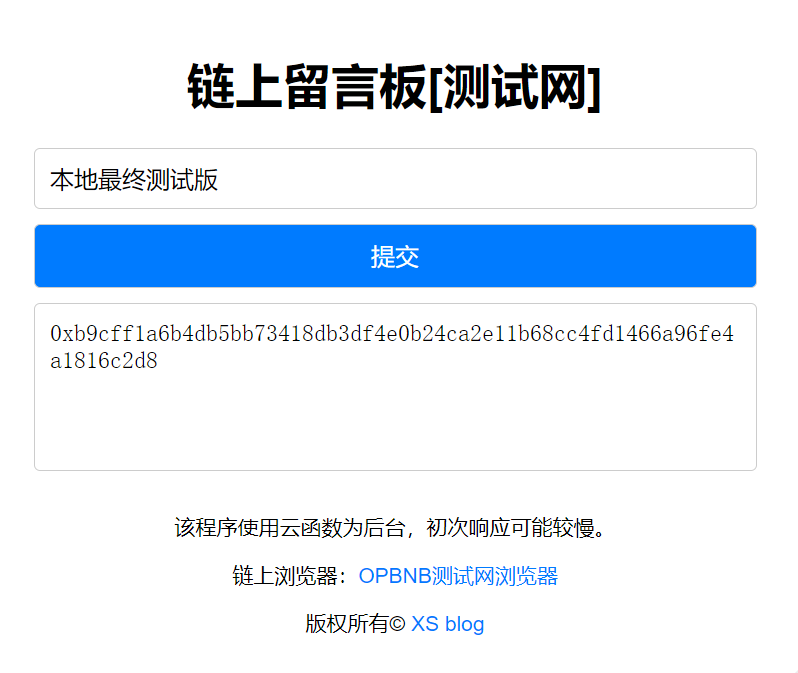
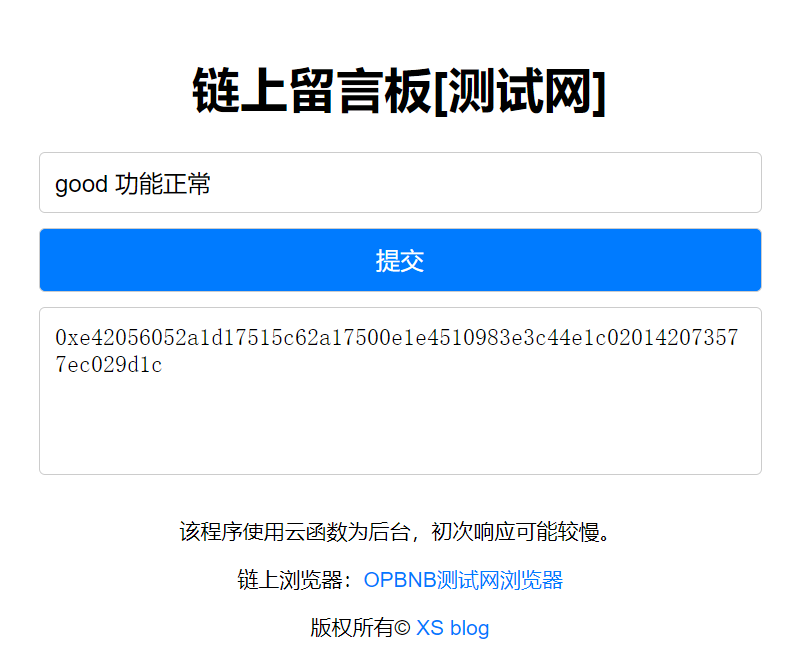
我再加上两行说明,变成这样。
感觉不错的样子。
发布上线: 前端我直接在博客里面上线好了,这样简单,反正就是一个页面的事情。
后端用云函数部署,成本应该也不高。
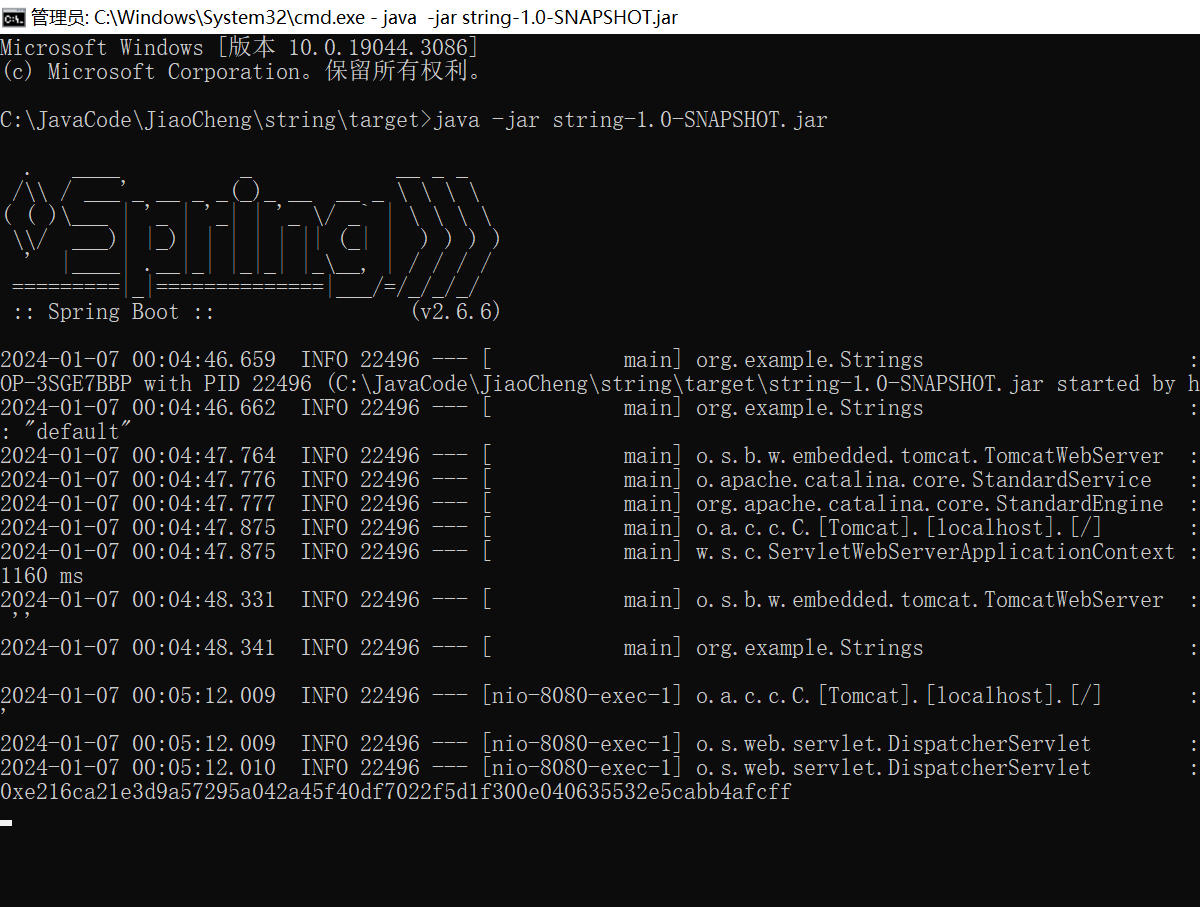
本地打包后30MB(如果打包失败请检查pom.xml中有无build内容)
jar包可以正常运行。
云函数部署在杭州,测试调用正常。(首次需要启动项目会比较慢)
这个就是用云函数测试的结果,调用正常。
如果没有使用,函数会休眠,基本上不收取费用,弹性收费,还是不错的。
最后的前端上线地址应该是:
https://120.show/text.html
你可以去测试玩耍(没有奖励)。
完结,撒花!